
Interactive Word Wall
This post contains affiliate links.
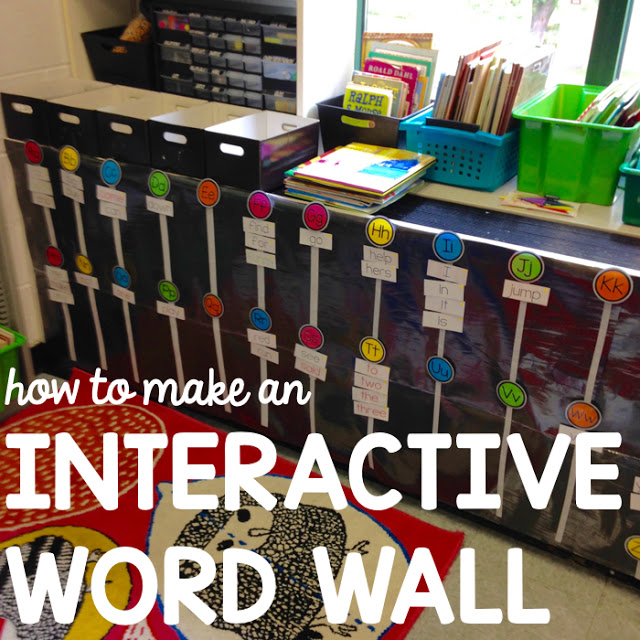
I started setting up my classroom at my new school this week, and was excited to find a place for my word wall in my pint-size, shared room! I almost didn't bring it with me from my old school, but I'm so glad I did.
This word "wall" is actually a huge piece of laminated bulletin board paper with velcro strips on it. At my old school, I taped it onto the back of two bookshelves that served as dividers. In my new room, as you can see, it's taped along the air conditioning ledge. You could of course apply the same concept to a bulletin board, but the nice thing about this word wall is that you can put it anywhere and bring it anywhere!
The first thing you need to do is laminate a long length of bulletin board paper (luckily I did this last year because my new school doesn't have a functioning laminator-- the horror!). Next, you'll need to figure out how you want to lay out your adhesive velcro. In my case, I did 12 vertical strips. If you're working with a narrower, but longer space you could do 26 short strips. Then, you'll need to add your letters of the alphabet. There are tons of word wall headers on TPT that you can just print and laminate. You can permanently affix your letters if you're sure of placement, or you can use velcro, as I did. Then just add velcro dots to the back of any words you want to add! The ones up on my wall are pre-primer words, and I'll add the rest of the Dolch words as the year goes on. I love having the velcro because I can easily switch out words. Kids can also pull of words to reference for spelling. I sometimes do sight word practice with it by asking students to pull of a certain word. Students can also practice recognizing initial letters by putting the words back on after they've been removed.
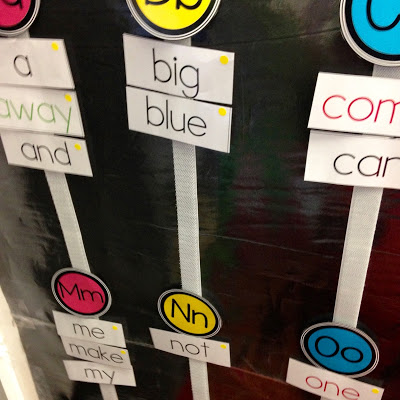
Here's a (badly lit) close-up of a portion of my word wall:
Let me know if you have any questions!