
How to Teach Silent Letters
After your students have mastered more basic phonics concepts, it’s time for them to learn common silent letter pairs. The most common ones are WR, GN, and KN.
As a special education teacher, I find that introducing silent letter pairs by sound works well. I usually teach WR first, and then KN and GN together, since they make the same sound. If you’re teaching general education, you may find that you’re able to progress more quickly. I follow the same general lesson plan for phonics each week, which is easier for both you and your students. In this post, I’ll use WR for the examples and explain how I would teach words with WR over the course of one week. You can follow the same structure when teaching KN and GN.
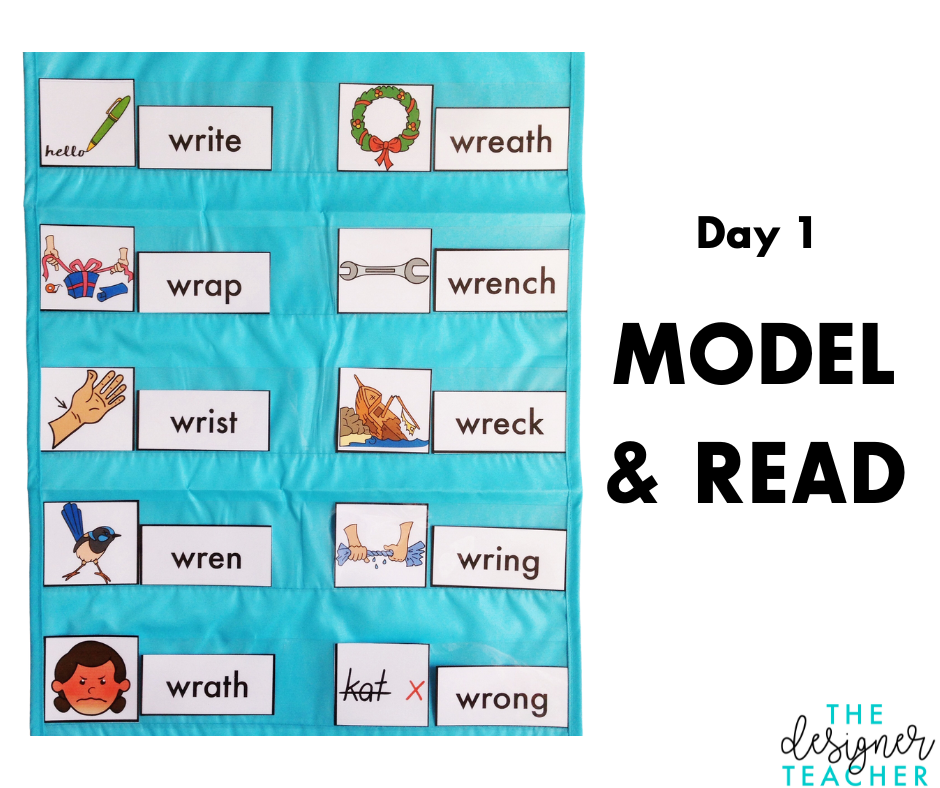
Day 1
Tell students that when the letter W comes directly before the letter R, the W is silent. When they see WR in a word, they should read it as /r/. Show a picture for “write” and say /r/ /ī/ /t/. Show or write the word “write”, and explain that in some words, we use WR for the /r/ sound. After modeling, lead students in guided practice of reading more words with WR. Then, practice reading fluency sentences together that contain words with WR. You can find the needed picture cards, word cards, and fluency sentences in my Phonics by Design WR Mini-Unit.

Day 2
Briefly review what you taught yesterday, and then tell students they’ll be practicing writing words with WR today. Show a picture card with wr, such as wreck. Model segmenting the word (/r/ /e/ /k/) and then writing each corresponding letter to write the word on the board or chart paper. You can explain that there is no rule for when to use R vs. WR for the /r/ sound, so for now you will tell them that all the words you’ll be spelling today begin with WR. Continue with other picture cards, having students segment the sounds as a group or taking turns. Finally, have students practice on their own by dictating words to them and having them write them down. You can also dictate a few short sentences that include only known word types and WR.

Day 3
Today students will independently practice reading and writing words with WR. I use the activity sheets included in my Phonics by Design WR Mini Unit and in my No Prep Pack.

Day 4
Review reading and spelling words with WR before introducing a simple silent letters matching game they can play in pairs. Spread out the cards in a grid face down. When it’s their turn, the student will turn over two cards and identify the pictures and/or read the words. If it’s a match, they keep the pair. If not, they put the cards back, face down. Students alternate turns until all pairs have been matched. The student with the most pairs wins. You can find the matching game in my Phonics by Design WR Mini Unit.
Day 5
Assess students by dictating ten words with WR and having them record them. If you have time and a small enough group, you may also wish to have individual students read a few words with WR for you as well.
This lesson plan schedule for teaching silent letters is simple but effective!
Save yourself time by snagging everything you need to teach silent letters in one place with my Phonics by Design Silent Letters, Soft Letters, and Trigraphs Unit Bundle. You’ll get all the materials mentioned in this post (picture cards, word cards, fluency sentences, activity sheets, matching game), plus posters, flap books, and more! Snag it here.

No time to read now?